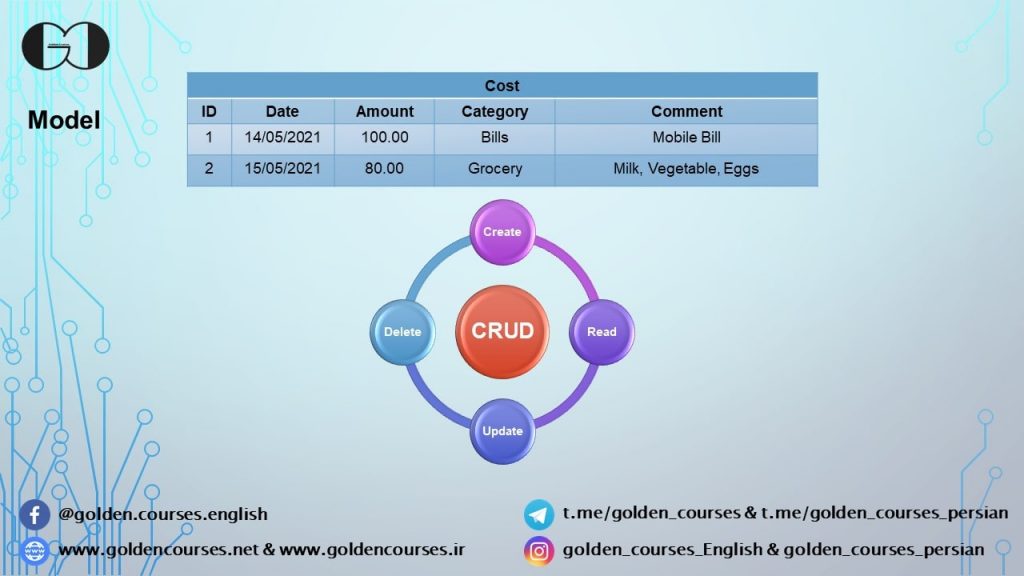
In this session of ASP.NET Core tutorial we are going to talk about Models and Repository in MVC Architectural Design pattern. As we describe earlier, Models indicate the state of application and its Business Logic. During this session we will create our first Entity Model and its Repository.
What is Model in MVC Architectural Design?
The Model part indicates the state of application or any business logic that is supposed to be performed by it. It is highly recommended that all the business logic should be encapsulated in Model part.
You can create your Web App Model, Repository and Interface in any place in your application, but due to better file structure, we highly recommend creating these classes within Models folder.
Create Model for Entity
For this purpose you should create a Class within your Web App Models folder. Then based on your entity properties, complete your Model. In this tutorial, we try to implement a Web App that can store your daily cost. Thus, we need an Entity for storing costs. We call this Entity Model “Cost” that has 5 properties. ID as primary key, Date, Amount, Category and Comments.
|
1 2 3 4 5 6 7 8 9 10 11 12 |
public class Cost { public int ID { get; set; } public decimal Amount { get; set; } public DateTime Date { get; set; } public string Comment { get; set; } public string Category { get; set; } } |
For adding Property, you can use prop abbreviation and then press Tab key twice
Adding Required Interface and Repository
To perform CRUD (Create – Read – Update – Delete) operations, we need to add an Interface and Repository for our Entities. This step is not mandatory. But, for implementing Dependency Injection that we will talk about it in further sessions, we need to create Interface and Repository for our Entity.
- Step 1: Create an Interface within your Models Folder
|
1 2 3 4 5 6 7 8 |
public interface ICostRepository { Cost GetCostByID(int id); } |
- Step 2: Create a Class within Models folder and Implement it from above created Interface
|
1 2 3 4 5 6 7 |
public class StaticCostRepository : ICostRepository { } |
- Step 3: Implement Interface Member to your Repository Class
|
1 2 3 4 5 6 7 8 9 10 11 12 |
public class StaticCostRepository : ICostRepository { public Cost GetCostByID(int id) { return costs.FirstOrDefault(c => c.ID == id); } } |
- Step 4: As we have not created database for storing data, we add some static record in our Repository
|
1 2 3 4 5 6 7 8 9 10 11 12 13 14 15 16 17 18 19 20 |
public class StaticCostRepository : ICostRepository { private List<Cost> costs = new List<Cost> { new Cost {ID=1, Amount=100, Date=DateTime.Now, Category="Bill", Comment="Payment for Mobile bill"}, new Cost{ID=2, Category="Grocery", Date=DateTime.Now, Amount=40, Comment="Payment for buying milk and vegetables"}, new Cost{ID=2, Category="Grocery", Date=DateTime.Now, Amount=40, Comment="Payment for buying meat and chicken"}, }; public Cost GetCostByID(int id) { return costs.FirstOrDefault(c => c.ID == id); } } |
Generally, for using Visual Studio IntelliSense you can press Ctrl + . or Alt + Enter in piece of code that indicated with red squiggle.
How we can use our Repository within our Controller
- Step 1: Register Interface service ConfigureServices Method of Startup Class
|
1 2 3 4 5 |
services.AddSingleton<ICostRepository, StaticCostRepository>(); |
- Step 2: Create Constructor for your Controller
|
1 2 3 4 5 6 7 8 9 10 11 |
public class CostController : Controller { public CostController() { } ... } |
- Step 3: Set the Interface as input parameter of Constructor
|
1 2 3 4 5 6 7 8 9 10 11 |
public class CostController : Controller { public CostController(ICostRepository _costRepository) { } ... } |
- Step 4: Create a private instance of Interface
|
1 2 3 4 5 6 7 8 9 10 11 12 13 14 |
public class CostController : Controller { private readonly ICostRepository costRepository; public CostController(ICostRepository _costRepository) { } ... } |
- Step 5: Set the value of Private Instance of Interface
|
1 2 3 4 5 6 7 8 9 10 11 12 13 |
public class CostController : Controller { private readonly ICostRepository costRepository; public CostController(ICostRepository _costRepository) { costRepository = _costRepository; } ... } |
We have just one Interface and Repository until now within our Web App and we can omit Dependency Injection and do this process much more easier. But, In further sessions you will realize the benefits of Dependency Injection and importance of this process.
If you need more details, watch this session video. Also, for being updated about our coming sessions, follow us on Instagram, Facebook, Telegram or YouTube and you can have access to list of all sessions HERE.
You can download this Session Slides form HERE


